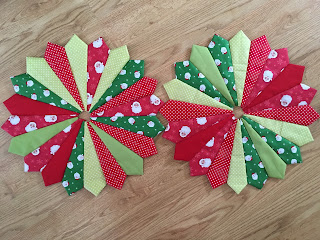
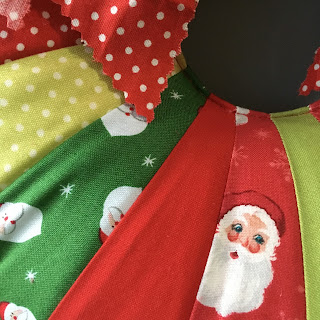
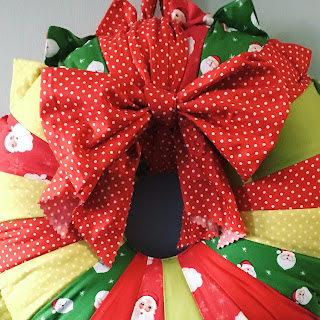
Today I'm sharing a tutorial to make this fun Double Dresden Wreath! It is a quick sew and a perfect way to brighten up your home. Obviously this one has a Christmas theme but you could make it for any season/occasion using appropriate fabrics. I demonstrated my design on the Sewing Quarter, you can see the video at the end of this post and lots of people messaged in with fabulous suggestions for fabrics they would use to make the wreath!
I used the Creative Grids 18° Dresden Plate Ruler to make this, I highly recommend Creative Grids but you can use another dresden plate template or ruler if you already have one in your possession. The segments I cut are 8" but you could make them bigger or smaller to create different sized wreaths.
You will need:
Fabric for the dresdens, you can use two or more prints or make it scrappy!
Toy filling (approx. 325g)
Pins
Pinking Shears
- Use your Dresden Plate Ruler to cut 40 pieces - 20 for each dresden. *Please note if you are using a different template check how many segments are required to make a full dresden plate and adjust this amount if necessary.
- With right sides together (RST) sew across the wider edge of the segment, backstitch at the beginning and end. It is quicker to chain piece all the segments at once.
- Clip the corner close to the stitches at the folded edge and turn right side out. Use a fine crochet hook or similar to push out the point. Try to make the seam on the reverse central and the points at the side should be horizontal.
- Sew the segments together but stop at least 1/4" away from the bottom. Continue to sew the segments together to make a full dresden plate. You can sew them in quarters or thirds and then piece them together to make it easier to manage.
- Repeat to make two dresden plates.
- From the reverse, fold back the seam of the inner circle by at least 1/4". By leaving the seams unsewn it should fold back easily to create a circle. Press and repeat for the other dresden plate.
- Place the dresden WRONG sides together. Match the outer points and pin in place - don't be afraid of stretching them slightly and just get them matching as neatly as possible, particularly at the inner points.
- Match up the inner circle, keeping the seams tucked inside and pin.
- Using a matching thread top stitch around the inner circle. Stop and pivot as necessary.
- Now stitch a circle around the outer edges, ignoring the points, and leave a gap for stuffing. The gap needs to be large enough for you to reach in and stuff the furthest part of the wreath. This will catch the seams of the points and create the shape of the wreath. Try not to sew a straight line across the base of the triangles but rather make a slight curve to keep a circular shape. Back stitch at the beginning and end.
- Stuff the wreath with toy filling. Use your hands and make it as compact as possible. Don't worry if it starts looking odd (and it will!), just keep packing it in and making a circle.
- Stitch the gap closed. I managed to do this easily on my machine, just make sure the stuffing is pushed out of the way. You could also hand sew it closed.
- To make the sash and bow use 2 strips of 8" x WOF, sew together along one short edge.
- Use pinking shears to trim along each of the long edges. Tie around the wreath to form a bow, you will have long tails which you can trim to your desired length. Fold the tails RST lengthwise and cut at an angle up towards the fold with pinking shears.
- Use a small piece of fabric to make a loop, attach to the back of the bow sash.
Hang your Double Dresden wreath and enjoy! I would love to see your version! Please tag me @charmaboutyou and add the hashtag #doubledresdenwreath on social media so I can see. I would appreciate you linking back to this tutorial too, thanks! Happy making!
(please excuse the fact there are different fabrics used in the pictures in this tutorial, one was the finished make and one was for my demo!)
linking to finish it up friday at crazy mom quilts


4 comments
Post a Comment
What a great idea Lucy! I’m adding this to my Christmas sewing list!
What a cute idea!!
looks really well, I could see this in different fabrics depending on the celebration
This is gorgeous! Such a fun wreath!